Information and help about the first mission of the game. It also talks about the Hangar and its various functions. Heading into the Fray: Character Selectionīefore you head into battle, you will be prompted to this screen: This is where you’ll buy and sell parts as well as customize your Wanzer. Once you’ve selected the option to head out of the base, you’ll be prompted to a character select screen. Since both Storm and Rain must always be on the battlefield, you don’t really have a choice at this point in time (although you will have more freedom later on). I will also participate in the training exercises.Ībout these… even if it’s a base for mercenaries you have an unusually large number of WAP with a complete set of parts, don’t you? Mission 1īefore you have control over your Wanzers, a quick dialogue will take place: Simply press right twice to access the “Go” button and head to the battlefield. Since border security is an important mission, the supply of the parts itself is performed promptly. I don’t think it’s reasonable to pitch him against 4 opponents! “We’ll sell you the parts, so stay on your guard of the borders”, that’s what they mean, huh?Įveryone has already taken up their positions. I disagree, you are unaware of his ability.

It’s ok the use the items I have equipped right? If our intel is correct, even four units won’t be enough. If that’s no problem, then let’s do this. In every mission, you will have certain conditions to fulfill. Most missions will involve destroying all the opponents while making sure Storm survives. Most of the time your partners can be destroyed (they’ll be back on the following missions, don’t worry). Winning Conditions: Destroy all opponents. Losing Condition: Storm’s Wanzer is destroyed. Once the winning conditions have been displayed to you, there’ll be a bit more dialogue… A Bit More Dialogue…įirst of all, before the virtual enemies appear, move your cursor to the green pointer. The Hangar (Front Mission 2089: Border of Madness English FAQ) The blue squares represent your moving range. If you’d like more information about combat, make sure to check the article about battle mechanics (see the table of content on the first page).Īfter you’ve been the first mission and once your return to the main menu, you’ll notice that a new location has been unlocked, the Hangar (格納庫). This is a location you’ll visit more than once as this is where you’ll purchase new parts and weapons for your Wanzers. Let’s have a look at what is available at the moment and how the Hangar works. Setup This is where you’ll go to purchase new parts and set up your Wanzer so that you are ready for battle.Īs of right now, select this option as this where you’ll spend most of your time during the game.Īfter you’ve done your selection, you’ll be prompted to another screen: Once you get there, you’ll have the choice of three different options. You will first need to select which Wanzer you would like to customize. In this case, as you only have two pilots, you will need to select ストーム(Storm) or レイン(Rain). This is where you’ll sell the parts you have in your inventory (not on currently equipped on your Wanzer). This is an overview of all the parts you currently have in your possession.

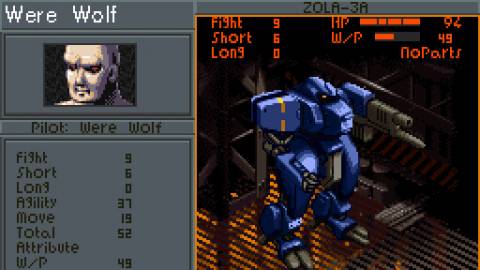
You can’t do much here besides browsing your gear and reading about some characteristics. We’ll explore the options available in Setup first. Setup (Front Mission 2089: Border of Madness English FAQ)īy using your stylus, you will select which part of your Wanzer you would like to tinker with. Fortunately, you have the English translation underneath each part so it should be easy enough to navigate. On your other screen, your Wanzer statistics will be displayed:Īs we’ve already mentioned in a previous article, each weapon belongs to one of the following categories: fight, short or long. The number displayed to the right represents your efficiency with that particular weapon type, the higher the number, the deadlier you will be when using weapons of that category.Īgility is a bit different in the sense that is doesn’t represent any offensive value. Agility represents your defensive strength. Move determines how far your Wanzer can wander about the battlefield on his turn. For more information about movement, check out the appropriate section in the table of content. W/P: This represents the weight of your Wanzer.


 0 kommentar(er)
